








Introduction:The moka pot is an entry-level tool that many coffee beginners use to step into the world of espresso, but improper operation can easily lead to uneven extraction or unbalanced flavors. This article delves into the structural principles of the moka pot, techniques for grinding and filling coffee grounds, heating timing and control, and shares how to use the moka pot’s espresso base to make a balanced and smooth latte with latte art. It also addresses common questions such as “Can you make latte art with a moka pot?” and recommends suitable coffee bean choices so you can brew flavorful Italian espresso at home.
Many coffee enthusiasts first encounter the moka pot in outdoor camping videos, where its simple operation and cozy lifestyle vibe attract them to try it. However, when using it for real, they often face issues with unstable extraction: sometimes the coffee is too light and bland, other times it’s overly bitter and harsh. Whether it’s the grind size or heating time, it’s hard to get right. This article will guide you from the basic structure and operation process to the full practice of making a latte, step by step mastering the moka pot’s usage tips. Through practical coffee bean examples, it explains how to maintain clear flavors and rich textures even after adding milk.
 Many people first come across the moka pot on social media platforms or camping-themed videos: its classic design, seemingly uncomplicated operation, and relatively affordable price lead them to decide to buy one. But after actual use, common issues include unstable extraction results, lack of flavor concentration, or confusion over questions like “How fine should the coffee grounds be?” or “How hot should I heat it?” This article will detail the basic construction of the moka pot, the correct steps for operation, and answer a common question: Can you make latte art with coffee brewed in a moka pot? The answer is yes — as long as you master the key techniques, you can also make a moka pot latte with milk foam patterns at home.
The inspiration for the moka pot’s creation is said to have come from an Italian who observed local women using a deep bucket-like laundry device. This device had ashes and soap at the bottom, which produced foam when in contact with water, rising to the upper laundry compartment to achieve a cleaning effect. Inspired by this mechanism, he designed the moka pot composed of three parts: the upper chamber, the funnel, and the lower chamber. To use it, fill the lower chamber about two-thirds full of water, place the funnel in, add finely ground coffee, then screw the upper and lower chambers together. When heated, the water in the lower chamber turns into steam pressure in a sealed environment, pushing the water through the coffee layer, eventually producing a highly concentrated coffee liquid in the upper chamber. To avoid excessive pressure and potential danger, the lower chamber is usually equipped with a pressure relief valve.
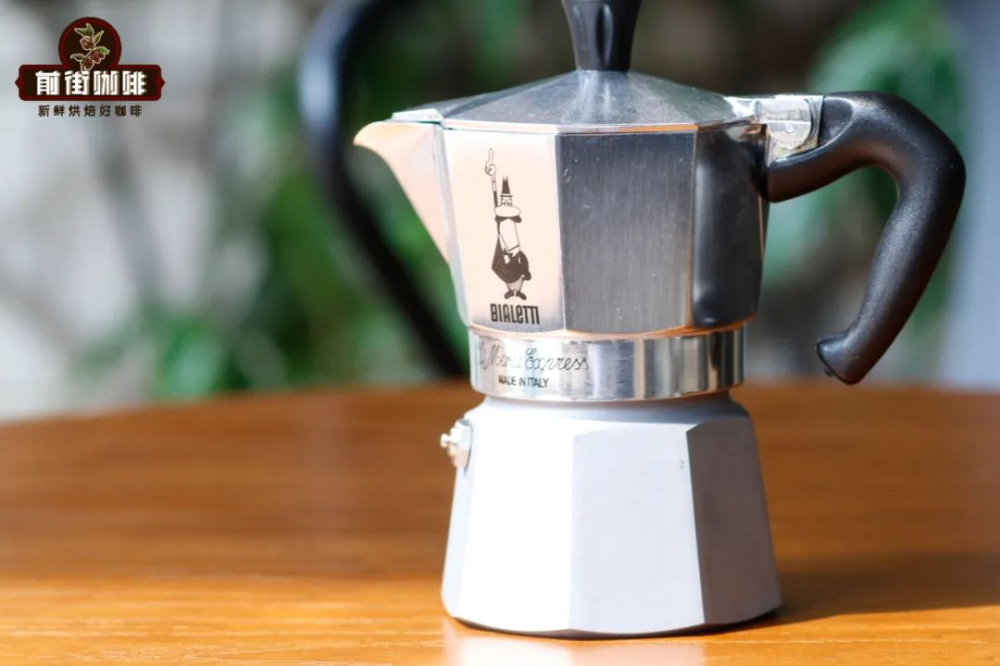 Although we often call it a “moka pot,” this is not its original name — that term is mainly popular in Chinese-speaking regions. In fact, its original intention was to allow ordinary households without an espresso machine to make a drink similar to espresso at home, so it is often referred to as an “espresso pot” abroad. The popularity of the moka pot is thanks to the Italian Alfonso Bialetti, who founded a brand under his own name and, through years of operation, made this appliance a common item in kitchens around the world. Later, his son took over the company and invited cartoonist Paolo Campani to design the iconic illustration of “the man with a mustache” based on Alfonso’s likeness, successfully bringing the moka pot further into family homes.
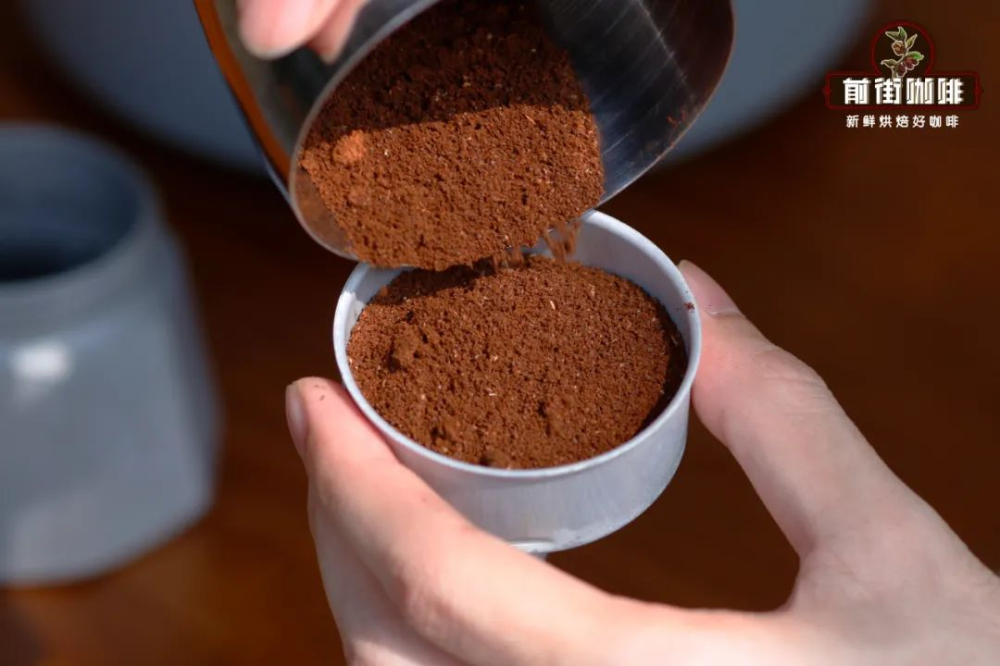
To brew coffee with a moka pot that has an espresso-like rich taste, the grind size of the coffee grounds is one of the keys. If you find the coffee you brew is too light, it’s likely because the coffee is ground too coarse, causing the water to flow through too quickly without fully extracting the soluble flavor compounds. So, how fine should it be? As fine as possible, but not so fine that it can fall through the holes in the funnel — generally, a texture similar to fine salt is recommended. For example, if using an EK43s grinder, you can adjust to a setting of 3–3.5. At this setting, using coffee beans from a certain region’s Queen Estate, you can bring out distinct nutty and cocoa butter aromas. However, the scale standards of each grinder vary slightly, so it’s recommended to fine-tune according to actual brewing results.
As for the amount of coffee grounds to fill, it generally depends on the capacity of the funnel of your moka pot. The simplest way is: pour the coffee beans into the funnel until they are level with the edge, then grind these beans and pour them back into the funnel — that’s roughly the right amount. After filling the funnel, it’s recommended to gently shake it left and right to let the coffee grounds naturally settle and flatten the surface, but do not press down forcefully. Compacting the coffee layer increases water resistance, prolongs extraction time, and can easily lead to over-extraction, affecting flavor balance.
Once preparation is complete, it’s time to add water. Pour hot water into the lower chamber — no need for precise weighing, just fill it to about 0.5 cm below the pressure relief valve. At this stage, there’s no need to strictly control the coffee-to-water ratio; the focus is on controlling the heating process afterward. Place the funnel filled with coffee grounds in, then screw the upper and lower chambers together, and place it on a heat source such as a gas stove, electric ceramic stove, or halogen oven. At the same time, you can preheat about 180–200 ml of fresh milk to around 60°C and pour it into a pitcher for later use (don’t froth the milk at this stage).
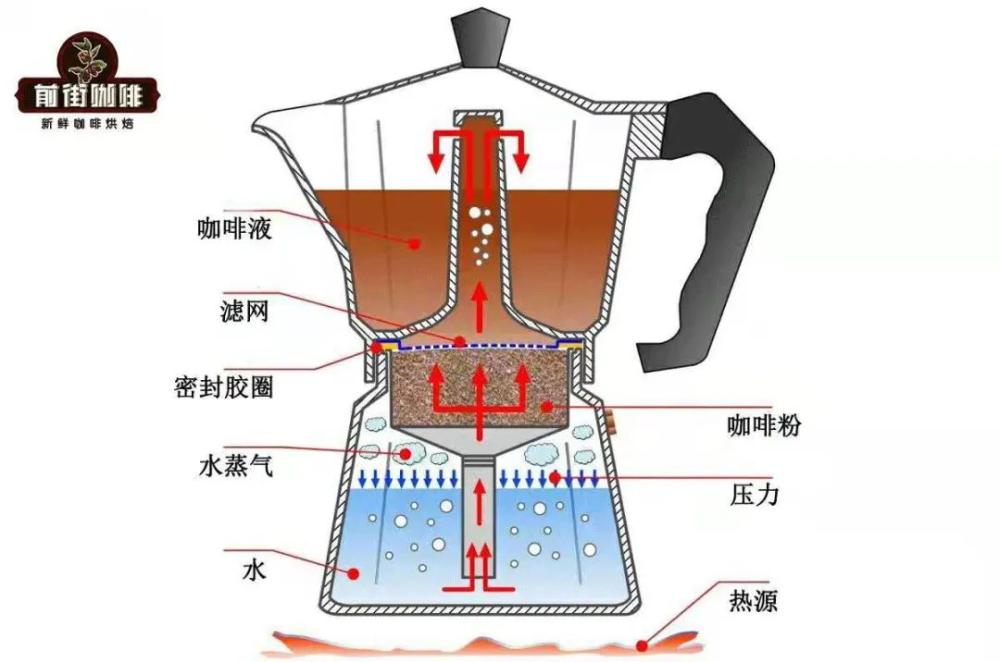 When the moka pot starts heating, you’ll soon hear a distinct “wuu wuu” sound, indicating that pressure is gradually building inside. At this point, immediately reduce the heat and open the lid of the upper chamber to observe the flow of coffee liquid and crema. When about half of the coffee liquid has flowed out of the upper chamber, you can turn off the heat source and move the moka pot to a tabletop. The remaining coffee liquid will continue to be “pushed” into the upper chamber by the residual heat and pressure inside, completing the extraction.
Next comes the milk part for making the latte: heat the fresh milk to about 60°C, and use a stirring tool or French press to introduce air into the milk, creating fine and dense microfoam. Finally, pour the brewed espresso into a cup, gently swirl the milk (to avoid separating the milk and foam), and you can start making latte art. As long as you master the basic latte art techniques, even espresso extracted from a moka pot can present milk foam patterns with a certain aesthetic appeal.
 To make a moka pot latte with balanced flavors, combining both milk and coffee notes, in addition to the operational details above, the choice of coffee beans is key. The ideal coffee beans should have clear aromas and layers, and still maintain their main flavor profile even after adding milk. It’s recommended to choose blends specially crafted for espresso machines or moka pots, as they can more consistently deliver the desired taste. For example, if you prefer a rich and bold flavor with low acidity, consider a blend based on Mandheling and Brazilian beans, with a small amount of Robusta added to enhance crema performance and body. If you want a smoother, fruitier flavor profile, you might opt for a blend that combines honey-processed beans with a medium-dark roast style, highlighting layers of fruitiness like strawberry and grape, while maintaining moderate crema and a soft mouthfeel.
The above content is compiled by CoffeeHunters, a coffee news website.


