







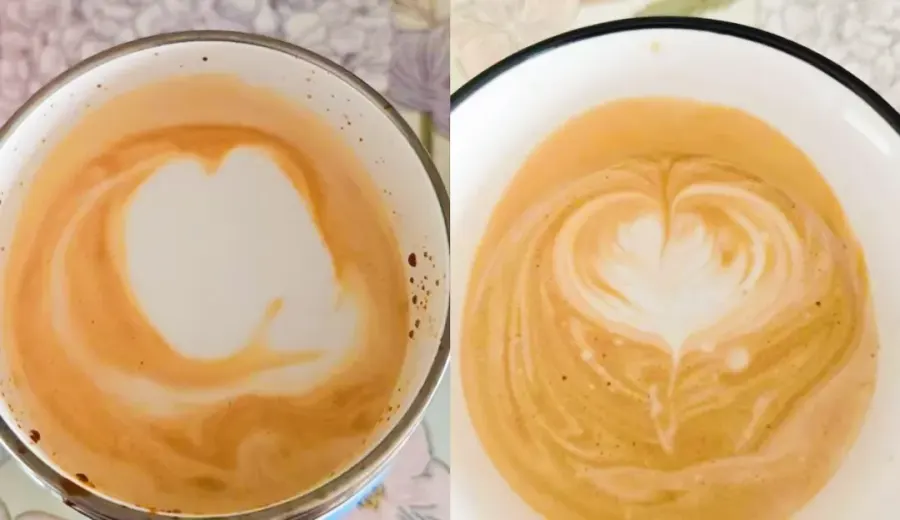
Introduction:Many coffee enthusiasts often encounter the issue of unattractive latte art patterns during practice, but the real problem isn’t their hand technique—it’s the quality of the milk foam. This article delves into the essential qualities of milk foam suitable for latte art, including its fine, velvety texture and fluidity. We’ll guide you through three key aspects—foaming time, milk temperature, and timing of execution—to help you create the ideal foam, resulting in clearer patterns and a cleaner background.
Many friends who enjoy pour over or espresso often share a common frustration when learning latte art: even though they’ve mastered the basic latte art gestures and techniques, the patterns they produce are still not aesthetically pleasing, with blurry lines or even a murky background. In reality, the issue is often not the technique itself, but the condition of the milk foam. To pour a latte with clear, well-defined patterns and distinct layers, the texture of the milk foam is absolutely crucial.
Ideally, milk foam suitable for latte art should be both fine and velvety, while also possessing a certain degree of fluidity. This not only allows the pattern lines to flow more smoothly but also ensures a more even integration of coffee and milk, resulting in a clean and neat background. However, achieving such a state of milk foam actually requires attention to many fine details, especially the three key elements: foaming time, milk temperature, and the timing of latte art execution.
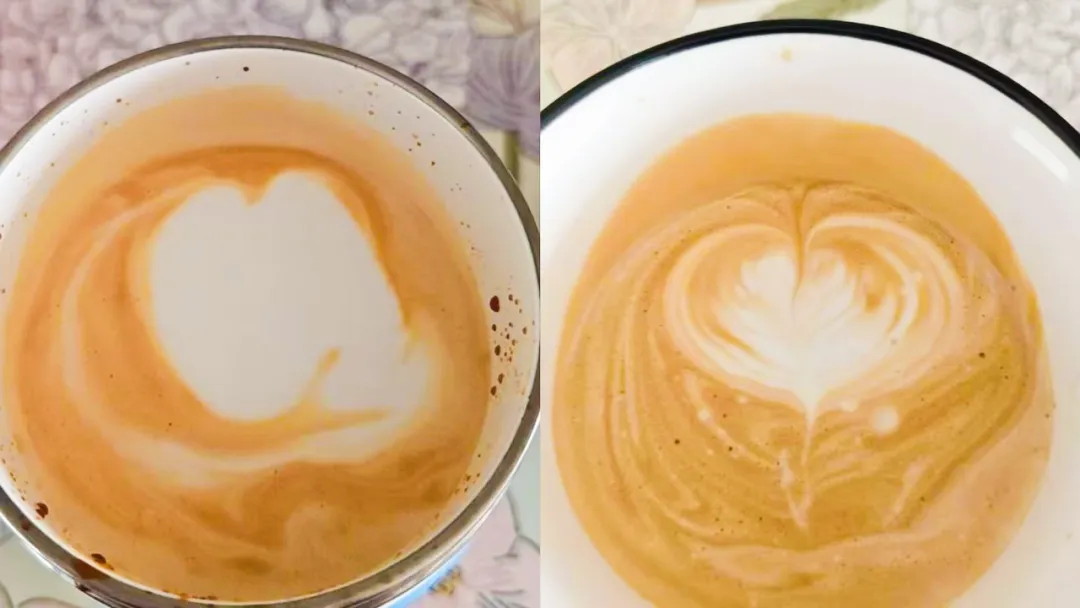
Sometimes you may notice that even when two cups of coffee are made around the same time, the latte art results can be vastly different. One might have clear, well-layered patterns, while the other appears blurry and murky, as if made by baristas with completely different skill levels. But in fact, this difference is often not due to a sudden improvement in technique, but rather a change in the quality of the milk foam.
Many people, even after mastering the correct latte art gestures, still struggle to consistently pour beautiful patterns. The key reason is the unstable quality of the milk foam being frothed. As long as you can produce fine milk foam with moderate fluidity, your latte art performance will naturally improve significantly. Even if you’re not a naturally gifted latte artist, you can easily pour professional-level patterns.

So, what exactly qualifies as “good milk foam” suitable for latte art? Simply put, high-quality latte art milk foam should have two main characteristics: one is being “fine and velvety,” and the other is having “moderate fluidity.” Fine-textured milk foam has a stable structure, is less prone to layering or rapid defoaming, which helps maintain the integrity of the pattern during pouring. Meanwhile, moderate fluidity aids better integration between the milk foam and espresso, resulting in a more uniform coffee base color, and also gives you more flexibility in controlling the flow of the pattern lines.

To control the thickness of the milk foam, the primary factor is the foaming time. The length of foaming time directly affects the thickness of the milk foam: the longer the time, the thicker the foam; the shorter the time, the thinner the foam. For common latte-style coffee like lattes, the ideal thickness of the milk foam is about1 centimeter. This thickness ensures the right balance between coffee and milk foam, resulting in clear patterns and a smooth drinking texture.
Taking a common commercial semi-automatic coffee machine as an example (such as models with medium steam pressure), the recommended foaming time is between0.5 to 1 second. In actual operation, adjustments should be made based on the steam pressure of your own machine. If the steam pressure is relatively high, the foaming time can be slightly shorter; conversely, if the steam is weaker, the foaming time may need to be slightly extended to achieve the same foam thickness.

Additionally, milk temperature is another important factor affecting the texture of the milk foam. It is recommended to refrigerate the milk in advance before frothing to lower its initial temperature. This not only extends the stretching time, helping to create finer and more stable foam, but also prevents the milk from aging too quickly due to excessive heat, which could negatively impact the overall flavor.
Moreover, it’s advised to perform latte art immediately after frothing the milk foam, avoiding letting it sit for too long. Because once the milk foam has been left standing for too long, it can easily separate from the underlying milk, losing its fluidity. Such foam is not only hard to control but can also make the latte art patterns appear blurry. If you unfortunately miss the optimal timing, you can try gently shaking the pitcher or swirling to remix the foam, helping to re-homogenize it—but be sure to use it as soon as possible to prevent further separation.

In summary, to pour clear and beautiful latte patterns, the top priority is learning how to froth fine, velvety milk foam with moderate fluidity. Mastering the foaming time, controlling the milk temperature, and executing latte art when the foam is in its best condition will greatly enhance your success rate and the aesthetic quality of your patterns. By focusing on these foundational details, even beginners can gradually pour exquisite patterns comparable to those of professional baristas.
The above content is compiled by CoffeeHunters, a coffee news website.


