








Introduction:When learning latte art, many people often encounter issues such as uneven milk foam or failed patterns at the beginning. In fact, as long as you master the correct steam wand technique, choose the right coffee beans, and understand the key points of milk integration and pouring posture, you can steadily improve. This article details how to use a coffee machine’s steam wand to produce ideal milk foam, introduces the characteristics of espresso beans suitable for latte art along with brewing suggestions, and guides you step by step in mastering milk integration and pitcher handling—helping you get more out of your latte art practice.
Many beginners attempting latte art often admire others effortlessly pouring beautiful heart or tulip designs, but when they try it themselves, the milk either clumps together or fails to hold shape, making even the most basic shapes difficult to achieve. In reality, latte art isn’t as hard as it seems—the key lies in stable milk foam quality, skilled integration techniques, and proper pitcher grip. Mastering these core elements will gradually elevate your latte art skills.
First, let’s talk about the most fundamental and important aspect—Milk Foam. Producing a pitcher of milk foam suitable for latte art is the first step to success. The foam should neither be too thick nor too thin, as either extreme can affect the texture of the coffee and the smoothness of the design. Ideally, the foam should have a certain degree of fluidity so that it can blend smoothly with the espresso when poured, creating a uniform coffee surface.

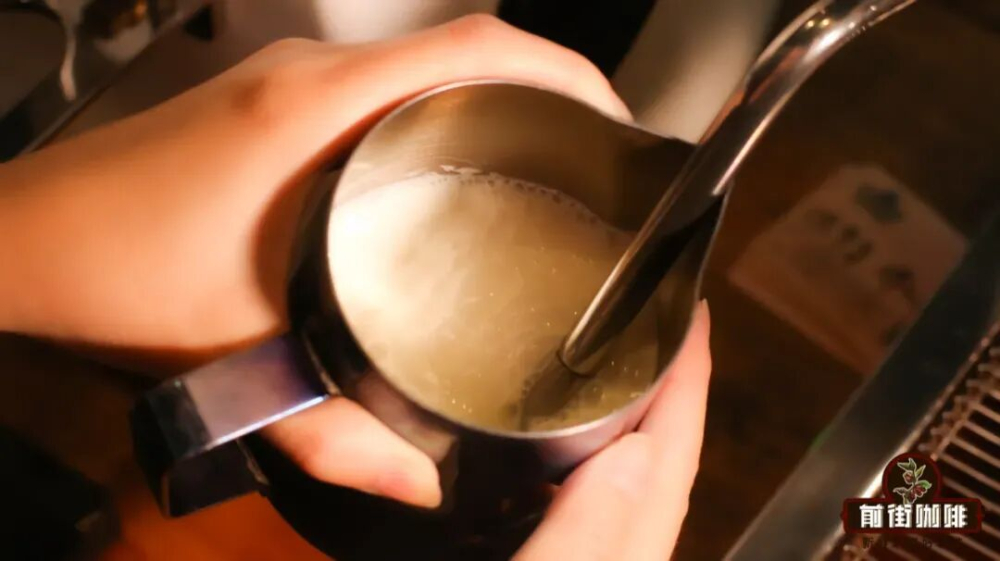
Before starting to froth the milk,the positioning of the steam wandis crucial. Generally speaking, with the spout of the pitcher at the 12 o’clock position, the steam wand should be placed at the 2–3 o’clock or 9–10 o’clock positions. This angle helps utilize the steam to spin the milk, creating a small whirlpool that draws the coarser bubbles downward, resulting in finer and denser overall foam. Moreover, the depth of the steam wand insertion also needs precise control—usually about 1 cm is ideal. If the steam pressure is too high, you can insert it slightly deeper, up to 1.5 cm; if it’s too low, reduce it to 0.5 cm, ensuring air is properly incorporated without causing splashing or over-frothing.
During the frothing process, it’s recommended to listen carefully to the sound. A “hissing” sound indicates that the milk is being frothed properly; if there is no sound at all, the steam wand may be inserted too deeply and hasn’t yet begun frothing. When the milk has expanded to about 80% full, you can slightly adjust the steam wand toward the center-right near the side of the pitcher to create a vortex-like rolling motion. This helps further mix the foam and milk, and reduces excessive foam layers, achieving the ideal smooth and fine-textured milk foam.

In addition to position and depth,milk temperature controlis equally important. It is recommended to heat the milk to between 55–65°C. If the temperature is too high, it can not only cause burns but also destabilize the foam structure, affecting both taste and latte art performance; if it’s too low, the milk won’t froth sufficiently, the foam may be too loose, and it won’t integrate well or hold patterns.
Next is theintegrationtechnique, which many beginners tend to overlook. In fact, the quality of integration directly determines the final taste of the coffee and the smoothness of the latte art. Before integrating, it’s recommended to gently swirl the crema on the surface of the espresso to even it out, then slowly pour the milk foam in a thin stream to ensure even blending between the coffee and foam, creating good fluidity. The range of integration is closely related to the thickness of the foam—if the foam is thicker, a wider integration area is needed to maintain surface fluidity.
To improve your integration feel, you can practice with water first. Tilt the cup at a 45-degree angle and inject a steady stream of water in a fixed spot, then gradually practice varying the height, circular pouring, and finally combining height variation with circular motion while keeping the water flow uninterrupted. Slowly bring the cup back to an upright position. This kind of practice helps familiarize you with fluid dynamics and lays a solid foundation for actual latte art later on.

Thecup and pitcher holding postureduring pouring also has a significant impact. It’s recommended to hold the cup with the handle facing you, so that when serving, the pattern naturally faces the customer. How you hold the cup can be adjusted based on personal comfort, but it must allow flexible control of angle and stability. Additionally, there are generally two ways to hold the pouring pitcher: by the handle or by pinching it. Holding by the handle allows you to use wrist strength to create larger, more elaborate designs; pinching the handle is better suited for more delicate and intricate adjustments.
While operating, make sure to keep the spout of the pitcher and the cup vertically aligned—otherwise, the pattern may tilt and affect overall aesthetics. At the same time, the cup should be appropriately tilted to bring the pitcher closer to the coffee surface, improving control precision. If the cup is too upright or the distance is too far, it becomes difficult to accurately control the direction of the milk foam.

Finally, and most importantly:Practice. No matter how detailed the techniques are, only through hands-on practice can you truly master them. If you’re worried about wasting coffee beans and milk, you can use a mixture of dish soap and dark soy sauce as practice liquid to simulate the flow and integration of milk foam. After each practice session, it’s recommended to review the process, identify issues such as overly thick foam, uneven integration, or improper posture, and then make targeted adjustments and retries. Only through continuous practice and reflection can you gradually improve your latte art skills and create stunning coffee art.

The above content is compiled by CoffeeHunters, a coffee news website.


