








Introduction:Want to easily brew a refreshing and captivating iced coffee at home? This article provides a detailed guide on how to use the AeroPress to make a clear-bodied, complex-flavored cold brew iced coffee. From selecting beans, adjusting grind size, controlling water temperature, to the specific brewing steps and timing, it takes you step-by-step through the key techniques. Using washed Yirgacheffe as an example, it explains how this coffee can showcase delicate acidity and juice-like mouthfeel through the AeroPress, offering practical inspiration for both beginners and advanced enthusiasts.
In the peak of summer, a cup of refreshingly flavored iced coffee can bring a moment of coolness and relaxation to a busy life. Many coffee lovers are curious about how to use the AeroPress at home to produce professionally brewed iced coffee. In reality, numerous factors influence the final outcome of iced coffee, including the roast level and processing method of the beans, grind size, water temperature, coffee-to-water ratio, as well as brewing time and technique—all playing critical roles.
For this demonstration, we’ve selected a washed coffee bean from the Kochere region of Yirgacheffe. These beans are grown at altitudes between 1,800 and 2,200 meters and processed using traditional washed methods. They exhibit bright lemony acidity, elegant black tea aroma, and a soft orange blossom finish. After extraction with the AeroPress and cooling with ice cubes, the acidity becomes even more refined, while highlighting a juice-like, refreshing mouthfeel—making it an excellent choice for a summer beverage.
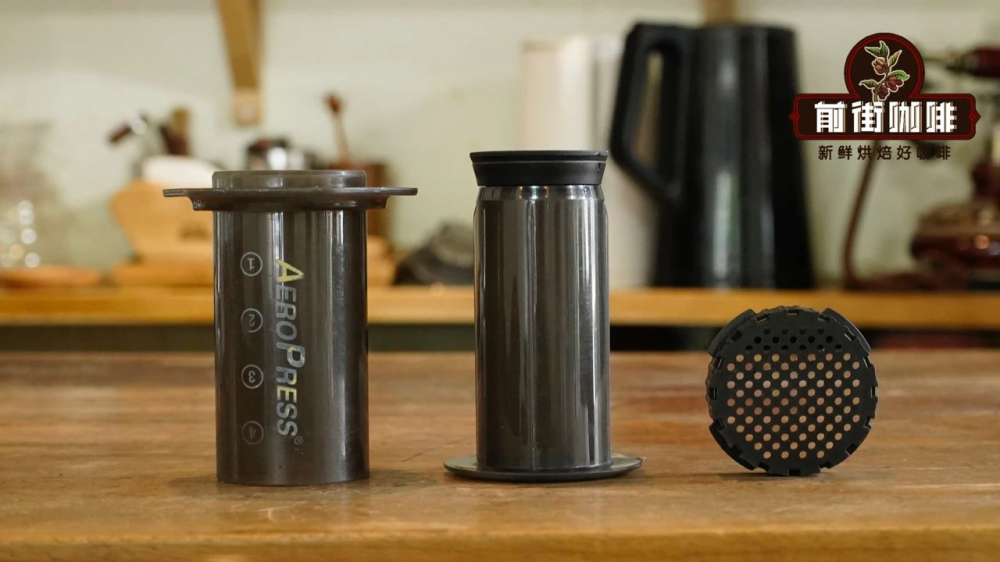
Speaking of the AeroPress, this small coffee brewing device originating from the United States combines multiple brewing principles: it incorporates the immersion concept of a French press, the paper filtration of pour over coffee, and the high-pressure extraction effect similar to an espresso machine. Its basic structure includes the brew chamber, filter cap, and a movable plunger. It’s easy to operate and allows adjustments in strength and mouthfeel based on different techniques, making it highly suitable for various coffee styles—including espresso-like intensity, pour over characteristics, and even iced cold brew.
When choosing coffee beans, it’s recommended to select different processing methods based on personal preference: if you enjoy fruity aromas and sweetness, consider honey-processed beans such as Costa Rica’s Musicians Series; for a bold and rich profile, Lintong or Golden Mandheling are good options; if you prefer clean acidity and fresh floral-fruity notes, washed Yirgacheffe or Kenyan beans are more suitable.
Below is a complete step-by-step operation process and practical parameters for making iced coffee with the AeroPress, using washed Yirgacheffe as an example. The goal is to extract a high-concentration coffee with good extraction yield, then adjust flavor intensity and mouthfeel balance by adding ice cubes for cooling and dilution according to personal taste.
[Brewing Parameters]
• Coffee bean: Washed Yirgacheffe (Kochere region)
• Coffee dose: 20 grams
• Coffee-to-water ratio: 1:9 (total water approximately 180 grams)
• Grind size: Fine, close to espresso grade (like fine flour)
• Water temperature: 92°C
• Extraction time: Approximately 1 minute 30 seconds in total
• Final amount of ice added: About 120 grams (adjustable based on taste)

[Step 1: Prepare the filter and coffee grounds]
First, take out the AeroPress filter cap, place the paper filter on it, and pre-wet it with hot water. This ensures the filter paper adheres tightly to the cap, preheats the equipment, and removes any paper taste.
[Step 2: Add coffee and pour water]
Turn the AeroPress upside down (plunger facing down), place 20 grams of finely ground coffee into the brew chamber, then slowly pour 180 grams of hot water at around 92°C, starting the timer simultaneously. It is recommended to use a thin, even stream of water to ensure full saturation of the coffee grounds.
[Step 3: Stir and wait]
After pouring the water, gently stir evenly for about 50 seconds using a stirring stick (or spoon) to promote full extraction of the coffee grounds. Then, cover with the filter cap and lightly press to expel excess air, ensuring smooth pressurized extraction later on.
[Step 4: Flip and pressurize to extract]
When the time approaches 1 minute, carefully flip the entire AeroPress over (filter cap and paper facing down, coffee grounds on top), then press down smoothly and with moderate force. The pressing process should last about 30 seconds to complete the extraction. At this point, you will obtain about 150 milliliters of high-concentration coffee liquid, with the total extraction time controlled at around 1 minute 30 seconds.
[Step 5: Cool and adjust]
Pour the extracted concentrated coffee liquid into approximately 120 grams of hard ice cubes prepared in advance. The cooling and dilution effect of the ice helps balance and refresh the coffee’s flavor. The amount of ice can be adjusted according to personal taste—if you prefer a stronger flavor, reduce the ice; if you like it lighter and crisper, you can add a bit more.
[Step 6: Mix and enjoy]
Finally, gently shake the cup to allow the ice and coffee liquid to fully integrate, ensuring uniform temperature and concentration throughout. At this point, you’ll experience clear lemony acidity, soft black tea sweetness, and a subtle orange blossom finish. The overall mouthfeel is clean and bright, with a juice-like freshness—perfect for savoring on a hot summer day.

The above content is compiled by CoffeeHunters, a coffee news website.


