







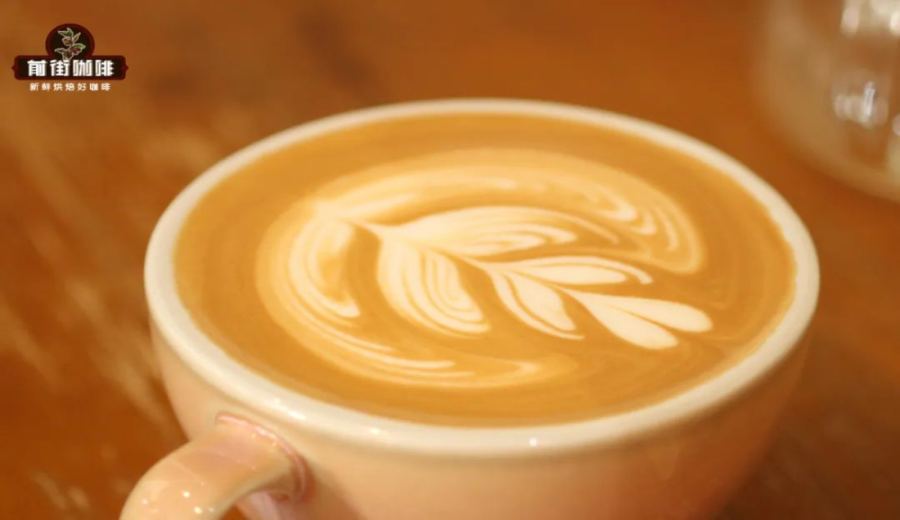
Introduction:To make a latte with intricate designs and a smooth texture at home, the key lies not just in brewing a great cup of coffee, but also in mastering milk frothing techniques and latte art skills. This article provides a detailed breakdown of the entire process—from introducing air into the milk, steaming and texturing it, to pouring and creating latte art—and offers practical methods using both fresh milk and water for progressive practice. This will help you overcome challenges such as "coarse foam" and "messy patterns," steadily advancing you from a beginner to an accomplished latte artist.
Making a hot latte with delicate latte art patterns at home may seem simple, but it comes with quite a few challenges. Many people get stuck at the milk frothing stage, leading to failed latte art or poor taste. In fact, as long as you master the correct techniques for milk texturing and pouring, even beginners can gradually create latte art comparable to that of café-quality standards.
First, understanding the basic composition of a latte is essential. As the name suggests, a latte is a style of coffee made with a large amount of milk and a small amount of espresso. In Italian, "Latte" literally means "milk." Therefore, if you order a "Latte" in Italy, the waiter might just give you a cup of hot milk. Outside of Italy, the term generally refers to a combination of "espresso and milk," usually in a ratio between 1:5 to 1:8—that is, 40 grams of espresso paired with 200 to 320 grams of milk.

In practice, it’s recommended to start with a 1:6 ratio—40 grams of espresso to 240 grams of milk. This ratio balances the aroma of the coffee with the creamy texture of the milk. However, the key to a good latte isn’t just the ratio; the texture of the frothed milk is the core element that affects overall flavor and visual appeal.
Frothing milk can be divided into two main stages: aerating and texturing while heating. The first stage is aeration, where steam from the steam wand is used to inject air into the milk, creating tiny bubbles and giving the milk a light, fluffy texture. During this step, the steam wand should be inserted slightly beneath the surface of the milk, allowing the steam to pull in air. You’ll hear a distinct “hissing” sound, which indicates that air is being forced into the milk. Typically, only 2–3 seconds of aeration is needed for latte milk foam. Too much aeration will make the foam too light and difficult to integrate with the coffee.
Next comes the texturing and heating stage. The goal here is to blend the initially aerated milk further to form fine, velvety microfoam, while heating the milk to the ideal temperature range—approximately 55–65°C. This stage involves creating a whirlpool by rotating the milk to break up larger bubbles and distribute the fine bubbles evenly. It’s important to note that once the “hissing” sound stops, the aeration phase is complete. From then on, focus on maintaining the whirlpool and controlling the temperature to avoid overheating or over-frothing, which can result in rough or large-bubbled foam.

Once the milk foam is ready, the next step is to integrate it with the espresso. The technique of blending directly impacts the final look and taste of the drink. Slowly pour the textured milk into the coffee, starting with the milk jug held slightly higher to increase the flow speed. This helps evenly mix the coffee’s crema with the milk foam, preventing noticeable white spots or layering. This stage is called “blending” or “the pour-in,” and its purpose is to achieve a uniform “golden base” across the drink’s surface. The result is a rich, smooth mouthfeel without any bitter or bland patches.
After blending, you move on to the “drawing” stage where the latte art pattern takes shape. At this point, lower the spout of the milk jug, letting the milk flow more slowly and in a concentrated stream onto the coffee surface. By coordinating wrist movements and adjusting the angle, you can create various patterns like hearts, leaves, or tulips. Key factors determining whether the design is clear and symmetrical include the distance between the jug spout and the coffee surface, the pouring angle, and the flow rate.
Many beginners often encounter problems such as patterns merging into a mess or milk foam failing to hold shape. These issues are often related to poor milk texture rather than just technique. If the foam is too coarse or the bubbles too large, even proper technique won’t yield fine patterns. Therefore, it’s advised that beginners first practice the basics of aeration and flow control using water before moving on to milk. Once comfortable, progress to steaming fresh milk to understand how different temperatures and milk qualities affect the foam. Finally, advance to actual milk latte art, starting with simple designs like hearts or small leaves, and gradually taking on more complex patterns.
Additionally, the posture during blending and pouring is extremely important. It’s generally recommended to hold the coffee cup in your left hand and the milk jug in your right. Adjust the distance between the jug spout and the coffee surface (about 5–8 centimeters) based on personal preference, while maintaining a steady pouring path and flow rate. Watching online latte art tutorials can be helpful, but don’t aim for overly complex patterns right away. Instead, start with the fundamentals—observe how professional baristas hold the jug, the pouring angles, and blending techniques—and build muscle memory through repeated practice.
In summary, crafting a latte with both aesthetic appeal and great taste requires attention to every step—from milk aeration, texturing, and temperature control, to blending techniques and latte art pouring. Through systematic practice—such as starting with water to control flow, then moving to fresh milk to understand foam characteristics, and finally returning to real latte art—you can significantly improve your learning efficiency. This approach helps you gradually overcome common issues, allowing you to enjoy professional-level latte art from the comfort of your home.
The above content is compiled by CoffeeHunters, a coffee news website.


