







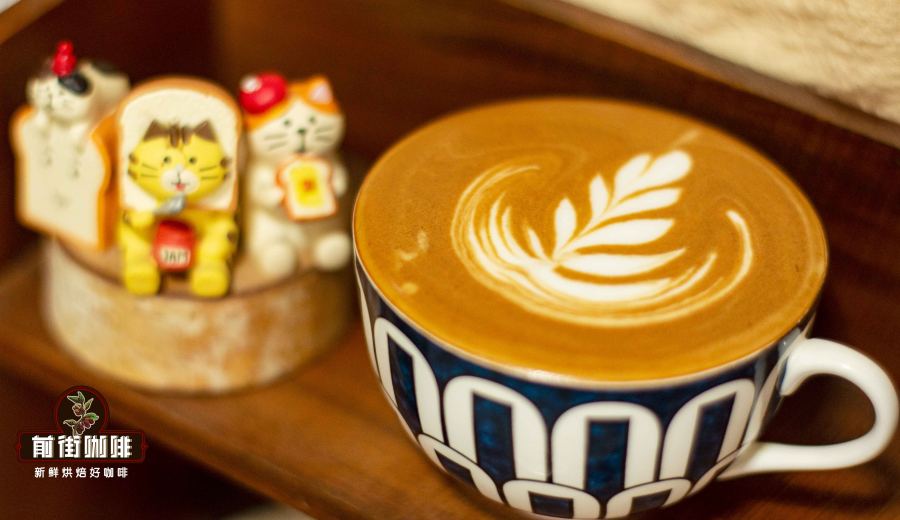
Introduction:Want to brew café-quality latte art at home? The key lies in choosing the right fresh milk, creating fine and stable microfoam, and mastering the extraction of the essence-rich espresso. This article provides a detailed breakdown of the types of fresh milk suitable for latte art, techniques for steaming milk, essential espresso extraction tips, and guides you step-by-step to draw the classic heart-shaped latte art pattern—even beginners can get started with ease.
Making a latte with an exquisite latte art design at home is not just about visual enjoyment—it’s also a great way to showcase your coffee brewing skills. Whether you’re a coffee enthusiast or simply want to add a café-like atmosphere to your home, mastering the right techniques for selecting fresh milk, handling microfoam, and extracting espresso will allow you to effortlessly create a professionally styled latte art coffee.
The success of a latte art coffee hinges on three key elements: first, choosing fresh milk that’s suitable for frothing; second, creating fine, stable, and velvety microfoam with good flow; and third, extracting an espresso rich in crema and balanced in flavor. Mastering these three foundations allows even beginners to quickly get the hang of it and craft their own latte art creations.

Why is latte art so important for a cup of latte? In fact, beautiful latte art not only enhances the overall visual appeal of the drink but also directly reflects the professionalism and technical skill involved in coffee preparation. For home coffee brewers, learning latte art is also an enjoyable and creative process. With the right milk and tools, plus some basic techniques, you too can replicate the dual sensory experience—both visual and taste—of café-quality coffee at home.
To create successful latte art, it’s essential first to ensure the microfoam is fine, stable, and has good fluidity, while the espresso should have just the right amount of crema. Only then can the coffee and milk blend and flow smoothly during the pouring and artistry process. If the microfoam is too coarse or thick, or if the espresso lacks sufficient crema, it will greatly affect the final latte art outcome.
Among the many milk options, it’s recommended to prioritize fresh milk that requires refrigeration, especially those with relatively higher fat, protein, and lactose content. Such milk offers a richer, creamier aroma and smoother texture, and is more conducive to producing microfoam with a stable structure.Casein micelles in milk are key to the texture of microfoam—they form a stable bubble membrane under steam, resulting in a smooth and delicate microfoam surface.Additionally, an appropriate level of lactose can release a natural sweetness at the right temperature, enhancing the overall flavor profile.

The ideal microfoam steaming temperature is recommended to be controlled between55 to 65°C, and should not exceed 70°C, as this can negatively impact the stability of the microfoam and the release of sweetness. When the temperature falls within this range, lactose and other sugars are most active, bringing out a natural hint of sweetness. Even without adding extra sugar, you can still enjoy the layered and smooth taste of the milk-coffee combination.
Next, let’s focus on espresso extraction—the soul of a latte art coffee. An espresso rich in crema and balanced in flavor not only elevates the overall taste of the beverage but also serves as a crucial foundation for forming latte art. It’s recommended to choose a medium-dark roasted espresso blend, such as the common Brazilian and Colombian mixed recipes, which deliver notes of nuts, caramel, cream, and a touch of chocolate, along with a stable layer of golden crema.
The crema of espresso comes from carbon dioxide in the coffee beans, which, under pressure extraction, combines with water and soluble substances to form a fine foam. The fresher the beans, the higher the carbon dioxide content, and the thicker the crema layer, which helps with stable performance during latte art.It is generally recommended to use coffee beans roasted within 7 to 30 days to achieve the best crema and flavor. For extraction parameters, you can refer to: 20 grams of coffee grounds, extracting 40 grams of coffee liquid, a 1:2 coffee-to-water ratio, water temperature around 94°C, pressure maintained at 9 bar, and extraction time controlled between 25 to 30 seconds. During actual operation, you can fine-tune grind size and extraction time according to personal taste preference.
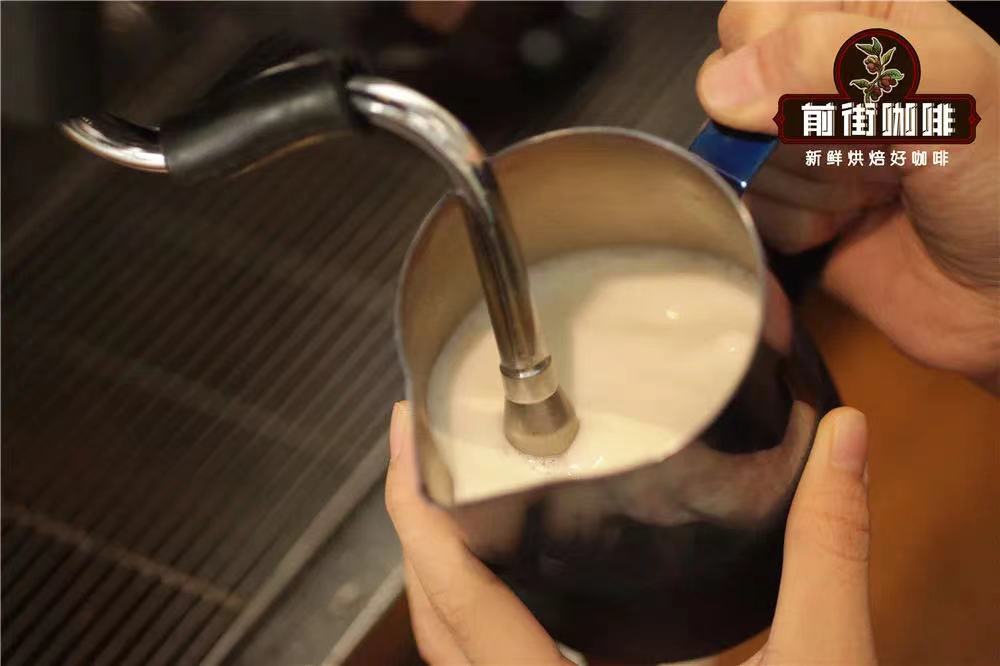
As for microfoam, it relies on the steam wand of an espresso machine. Before starting, make sure to purge the steam wand to remove any condensed water, to avoid introducing excess moisture into the milk, which could lead to a loose microfoam structure. Tilt the milk pitcher at about a 45-degree angle, and insert the steam wand about0.8 to 1 centimeterbelow the milk surface. This angle helps create a small whirlpool, effectively “breaking up” larger bubbles and making the microfoam finer and more even.
In the initial stage of frothing, you can insert the steam wand deeper to start steaming, focusing mainly on initial heating and slight aeration. When you hear a distinct “hissing—hissing” sound, it means you’ve entered the main aeration phase. At this point, slightly raise the steam wand to maintain a depth of about0.3 centimetersbelow the surface, and aerate briefly for approximately 4 to 5 seconds to achieve about 1 centimeter of microfoam thickness—ideal for latte art. After that, readjust to a 45-degree angle and appropriate depth, continue rotating the milk pitcher to create a whirlpool, ensuring the microfoam is evenly distributed and warmed to the desired temperature range.
Finally, move on to the hands-on stage of creating a heart-shaped latte art. First, pour the freshly extracted espresso into the cup, then gently swirl the steamed milk with microfoam to fully integrate them, ensuring the surface appears uniform and free of layers. Next, bring the milk pitcher close to the rim of the cup, starting to pour from about one-quarter of the side of the cup, using small circular motions to gradually blend the milk and coffee until the cup is about seven-eighths full.

Once the blending reaches the right proportion, begin adjusting the angle of the cup and the position of the milk pitcher, slowly moving the pouring point toward the center while gradually raising the pitcher spout and reducing the flow rate. When the liquid level in the cup approaches nine-tenths full, it’s time for the finishing touch. At this critical moment, swiftly lift the pitcher spout, precisely guiding the microfoam along the central axis to settle at the base of the heart shape, and cut off the flow abruptly to leave a clean, sharp tail—completing a beautiful heart-shaped latte art pattern.
In summary, every step—from selecting fresh milk, frothing microfoam, to extracting espresso—affects the success of the final latte art. With the right techniques and plenty of practice, you too can easily create café-level latte art at home, enjoying the fun and sense of achievement that comes with crafting your own coffee.
The above content is compiled by CoffeeHunters, a coffee news website.


