








Introduction:Are you often encountering issues like blurry patterns or uneven blending when practicing latte art? This article delves into the aeration and texturing stages of milk frothing, the key details of pouring techniques, as well as posture and angle control during pattern formation, helping both beginners and advanced learners master the secrets to consistently pouring exquisite designs—ensuring every cup delivers a professional-level visual and taste experience.
Want to learn latte art but can’t seem to pour clear patterns? In fact, by mastering the details of milk frothing and the key techniques of blending and pouring, you can consistently produce beautiful latte art. This article systematically analyzes common problems and solutions—from the steam wand’s aeration operation, milk frothing and heating, blending techniques to pouring posture—whether you’re just starting out or hitting a plateau, you’ll find practical advice here.

Many baristas go through a phase of trial and error when first learning latte art. The “hiss~ hiss~” sound of the steam wand is constant—some manage to grasp the essentials within just a few days, effortlessly pouring all sorts of patterns; others, however, grow more frustrated with practice, their once-decent heart shapes gradually distorting, or even failing to complete the basic outlines. To break through such bottlenecks, the top priority is identifying the root cause of the failures.
To excel at latte art, understanding the principles behind it is crucial. When the crema (coffee oils) from an espresso meets the fine microfoam created by steamed milk, the difference in density causes the coffee liquid and milk to sink while the oils and foam rise. Through this natural layering contrast, beautiful floral patterns are ultimately formed.
The latte art process is mainly divided into two major steps: blending and pouring the design. During the blending stage, slightly raise the spout of the pitcher, allowing the milk to flow into the coffee at a certain speed and angle. The impact helps evenly incorporate the microfoam, avoiding noticeable white streaks on the surface. When entering the pouring design stage, lower the pitcher spout so the microfoam gently settles on the liquid’s upper layer. By using different pouring and swirling techniques, a variety of white lines and shapes can be created.
However, many people often encounter issues with blurry patterns when pouring latte art, often blaming incorrect posture, milk layering, cups being too deep, or overly stiff crema—yet they overlookthe key foundation that is the fineness of the milk foam. If the milk foam isn’t fine enough, even the best technique will struggle to produce clear patterns.

Milk frothing can be divided into two stages: aeration and texturing/heating. During frothing, the high-temperature steam released by the steam wand enters the milk through the steam holes. When the steam holes are partially exposed above the milk surface, air is drawn into the milk, resulting in the distinct “hissing” sound. For example, when making a latte, generally only2–3 seconds of aeration timeis needed. To create milk foam with moderate thickness and a smooth, fine texture, in addition to controlling the amount of air, you also need to create a vortex to fully texture the milk—a process that requires patience and feel. It’s recommended to practice more to get familiar with the milk’s flow and response.
Blending is an extremely important part of the latte art process. Good blending ensures the coffee has a uniform “golden base color,” which not only looks appealing but also results in a smoother, more balanced taste. If blending is inadequate, it not only detracts from the appearance but may also lead to inconsistent flavors—sometimes bitter, sometimes weak—and even noticeable foam separation. When operating, it’s recommended to hold the cup in your left hand,tilting it steadily at about a 45-degree angle, while holding the pitcher in your right hand. Keep the pitcher spout5–8 centimeters awayfrom the coffee surface, and coordinate both hands to swirl in the same direction. Be careful not to touch the cup walls to ensure the milk foam and coffee are fully blended.
The posture during pouring is equally important. Taking the most basic heart shape as an example, once the milk and coffee are about 70% full, you can begin lowering the pitcher to start shaping the design. The key lies in adjusting the cup’s tilt angle while pouring the milk foam, allowing it to naturally flow into the cup with the liquid. Additionally,regardless of the design being made, you should gradually bring the cup back to an upright position while pouringto ensure the milk foam evenly emerges on the coffee surface, forming clear patterns.
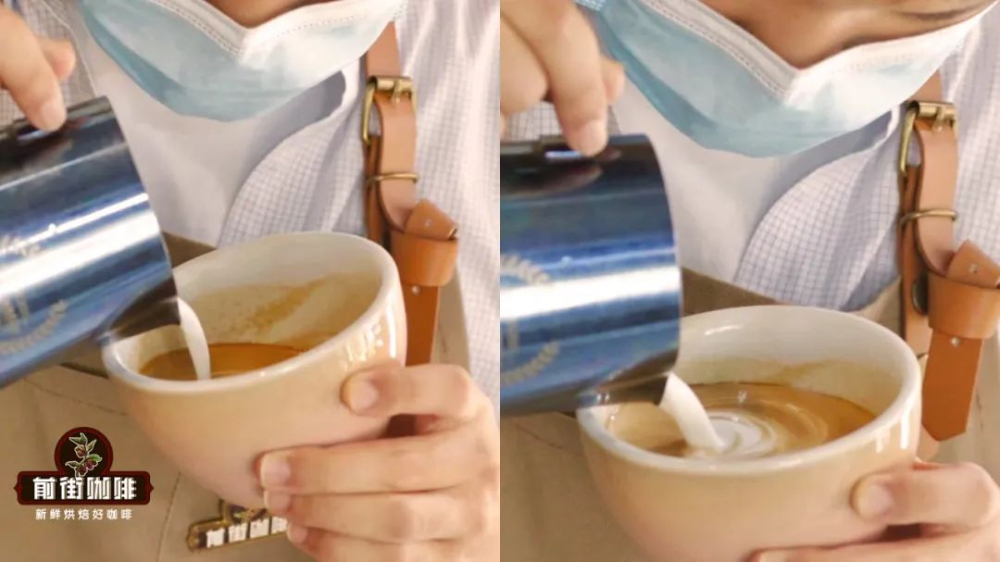
Today, there are numerous latte art tutorial videos online, ranging from simple white hearts and leaves to complex embossed tulips and animal shapes—the resources are quite abundant. However, many learners often jump straight to challenging patterns, overlooking the observation of professional baristas’ details in basic movements, such as how they hold the pitcher, the pouring angle, blending techniques, pouring sequence, and returning the cup. It’s recommended to start with observation and imitation, then build muscle memory through repeated practice. When necessary, ask someone to help check your posture to ensure each movement is correct and precise.
There are no shortcuts to learning latte art—only through continuous practice and reflection can you gradually improve. For beginners, it’s recommended to start by practicing with fresh milk to get familiar with the steam pressure and the feel of blending milk foam with coffee. Then, switch to using water to focus on mastering aeration volume, vortex creation, and temperature control until your feel is stable. Afterward, proceed with actual milk practice, starting with simple designs like hearts or tulips, and gradually review your progress and results.
The above content is compiled by CoffeeHunters, a coffee news website.


