







Introduction:The moka pot is many coffee enthusiasts’ first “espresso extraction tool.” By using steam pressure generated through heating, it pushes water through a bed of coffee grounds to extract a rich flavor. This article not only provides a detailed breakdown of the moka pot’s structure and working principles, but also guides you step-by-step through the five stages of extraction from scratch. It also includes practical tips on grind size, heat control, coffee dosage, and highlights common operational mistakes to help you consistently brew coffee with crema and a balanced acidity and bitterness.
As a classic stovetop espresso brewing device, the moka pot stands out for its simple operation and relatively affordable price, making it a top choice for many beginners entering the world of espresso. Its working principle involves heating water in the lower chamber until it boils, generating steam pressure that forces the hot water upward through the coffee grounds in the middle filter, eventually collecting as a rich-tasting coffee liquid in the upper chamber. While this extraction method may not be as precise as that of a professional espresso machine, it can still produce a similarly intense and layered cup—especially well-suited for home or small-space use.
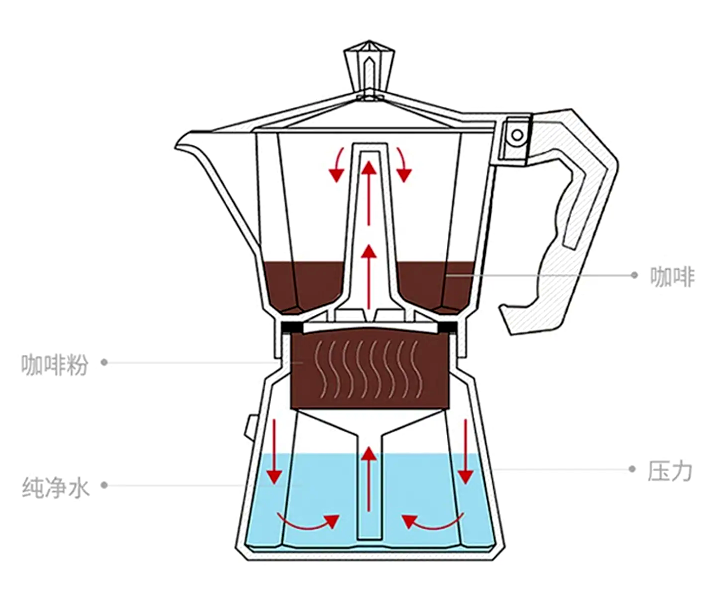
Before diving into how to use a moka pot, let’s first get familiar with its basic structure and working principle. The moka pot mainly consists of an upper chamber, a lower chamber, and a filter assembly in between. When the water in the lower chamber is heated and turns into steam, the pressure gradually increases, pushing the water upward through the hollow tube, passing through the coffee grounds in the filter, and finally dripping into the upper chamber to form a concentrated cup of coffee. Typically, a moka pot can generate about 1.2 to 3 atmospheres of pressure—though not as high as the 9 bars of a commercial espresso machine, it is sufficient to extract noticeable coffee crema and a rich body.
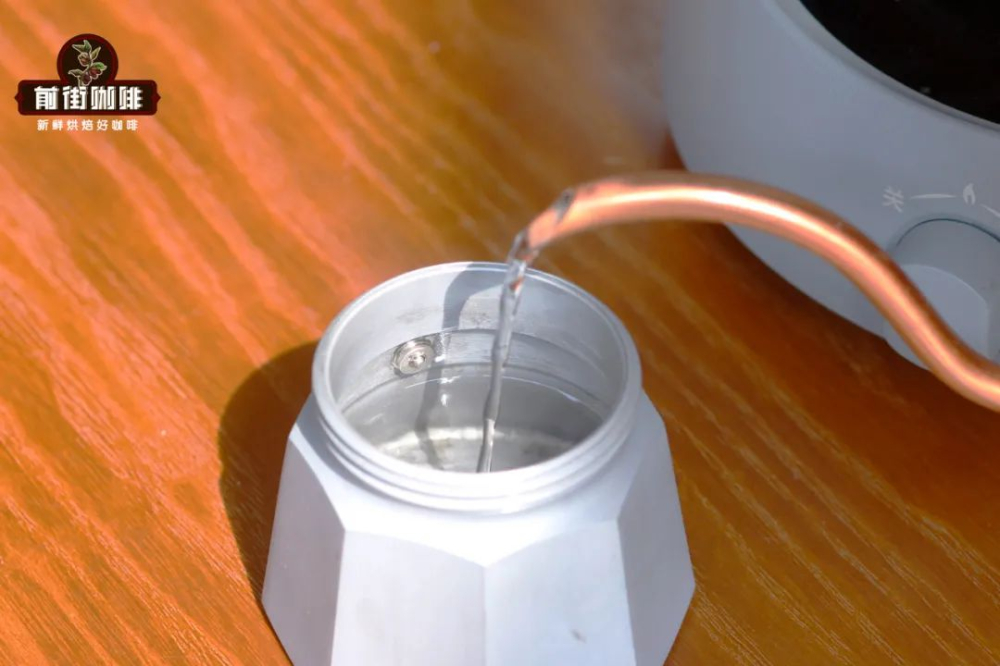
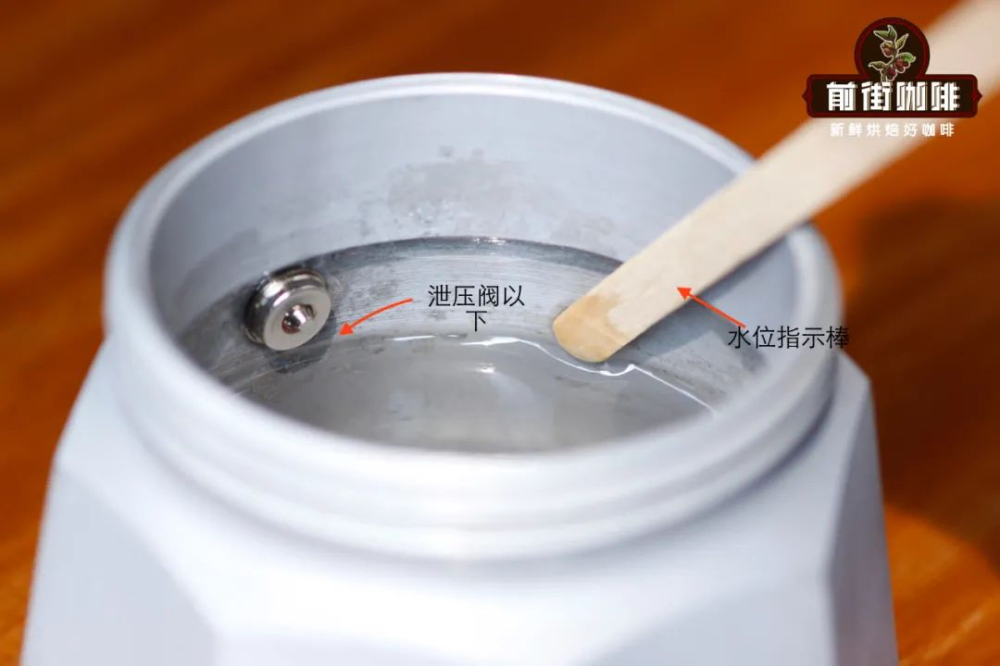
Before you start brewing, you’ll need to prepare a few essential tools: the moka pot itself, freshly roasted coffee beans, a grinder, a heat source (such as a gas stove or induction cooker), and water. It’s recommended to use purified cold water and measure the appropriate water level in advance, which helps control extraction time and flavor balance. For example, if you’re using a three-cup moka pot, such as the classic Bialetti model, it’s suggested to use about 18 grams of medium-dark roasted coffee beans and fill the lower chamber with water up to about 0.5 cm below the safety valve to avoid pressure abnormalities or heating hazards caused by excessive water levels.
First step: Pour fresh water into the lower chamber of the moka pot. Though this seems simple, there are several details to note. It’s recommended to use room temperature or slightly warm water, which helps shorten the overall heating time and reduces the chance of over-extraction or burnt, bitter flavors due to direct contact with very hot water. When adding water, make sure the water level is at least 0.5 cm below the bottom of the safety valve—this valve is a crucial design feature that prevents pressure buildup in case the coffee grounds are too fine or the channel is blocked. If the water level covers the safety valve, a blockage could cause a dangerous pressure surge.
Next comes grinding and filling the coffee. To achieve a rich extraction, the grind size for a moka pot needs to be finer than that for pour over, but should still maintain some flowability to avoid overly compacted coffee that restricts water flow. It’s generally recommended to adjust your grinder to a setting close to that of an espresso machine—for instance, a grinder like the EK-43s can be set to around 0.5. For a standard three-cup moka pot, a suitable coffee dosage is about 18 grams. After grinding, pour the coffee into the filter basket, then gently level it without pressing it down firmly—over-tamping can impede water flow, leading to uneven extraction or splattering.

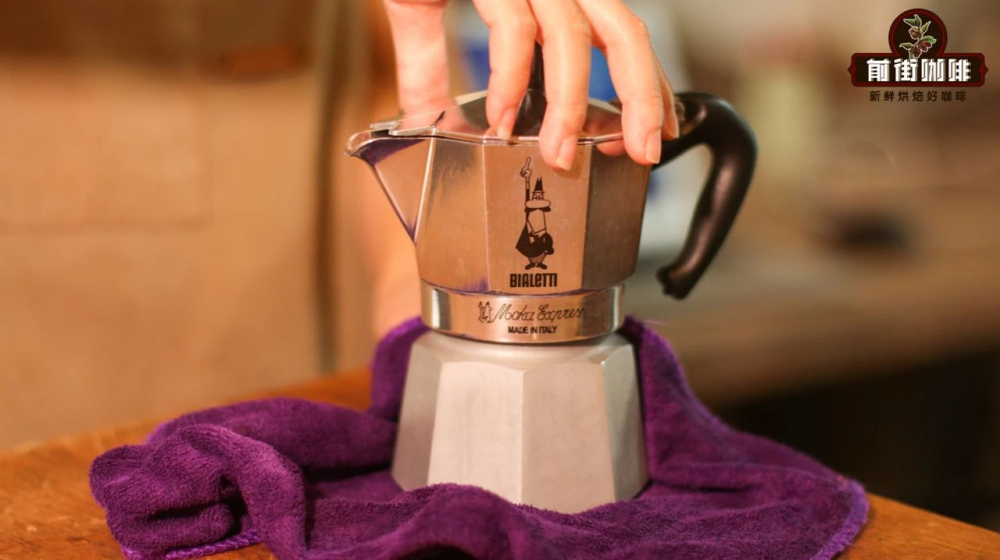
Once the coffee is added, assemble the filter basket with the lower chamber, then screw on the upper chamber securely. Make sure the upper and lower chambers fit tightly together to prevent air or water leakage during heating. Before you start heating, it’s a good idea to wipe the outer surface of the pot dry with a cloth to avoid excessive external heating or moisture affecting heating efficiency. When placing the assembled moka pot on a gas stove or induction cooker, if using an open flame, ensure the flame does not extend beyond the base of the pot—concentrated heating improves temperature efficiency while reducing the risk of localized overheating.
As the moka pot heats up, you’ll soon hear a slight hissing sound—this signals that the water is boiling and pressure is beginning to build. At this point, reduce the heat to avoid overly rapid pressure release, which can lead to over-extraction or coffee spraying out. As the pressure stabilizes and rises, the coffee liquid will gradually rise into the upper chamber. Once the liquid reaches about halfway up the upper chamber, you can turn off the heat. After turning off the heat, let the pot sit for a few seconds to allow residual heat and pressure to complete the final stage of extraction—this helps round out the flavors and avoid excessive bitterness from over-extraction.

After extraction is complete, carefully remove the upper chamber and pour the coffee into your cup to enjoy. Coffee made with a moka pot typically has a higher concentration and crema content, often delivering distinct notes of chocolate, caramel, nuts, and mild fruit acidity. If you prefer a lighter taste, you can dilute it with some hot water or pair it with milk to make variations like lattes. Additionally, the strong flavors extracted by the moka pot pair well with medium to dark roasted beans, which are usually softer in texture and richer in oils, allowing them to showcase more balanced acidity, sweetness, and aroma under high pressure.
There are also several small but important details to keep in mind when using a moka pot daily. First, the metal parts of the moka pot can become extremely hot during use, so it’s recommended to use a towel or heat-resistant tool to handle it and avoid direct contact to prevent burns. If you hear unusual whistling noises during use but no coffee liquid comes out of the upper chamber, it may indicate a blockage in the spout or filter—stop heating immediately, let it cool, and then inspect and clean it to prevent dangerous pressure buildup.
In addition, the evenness of the coffee bed and the amount of coffee used can greatly affect the extraction results. If the coffee is too coarse, water will flow through too quickly, leading to under-extraction and weak flavors; conversely, if the grind is too fine, it can lead to over-extraction, resulting in burnt, bitter, and astringent tastes. Moreover, when filling the coffee into the basket, try to spread it evenly and avoid leaving gaps—otherwise, the pressurized water from the lower chamber may bypass the coffee grounds, failing to extract flavors effectively and potentially causing splattering or poor taste. After each use, it’s also advisable to disassemble and clean the moka pot promptly to prevent coffee residue from causing odors or clogging.
When choosing coffee beans, medium to dark roasted beans usually bring out the best potential of a moka pot. These beans, due to their higher roast level, have softer cell walls that release abundant caramel, chocolate, and nut aromas under high-pressure extraction, along with better crema development. In contrast, light roasted beans are harder in texture—if brewed in a moka pot, they often require a much finer grind and more precise parameter control; otherwise, they can yield sharp acidity and unpleasant astringency. Therefore, if you’re just starting out with a moka pot, it’s recommended to choose medium to dark roasted blends or espresso blends for more stable and flavorful results.
The above content is compiled by CoffeeHunters, a coffee news website.


