








Introduction:Want to learn latte art but not sure where to start? This article breaks down the fundamental principles of latte art, including the differences between pouring (fusion) and drawing (design), key techniques, common mistakes, and offers practical advice on how cup design affects latte art outcomes. Whether you’re a beginner just getting into latte art or an intermediate looking to break through a plateau, you’ll gain core insights and a systematic approach to practice.
Many coffee enthusiasts are drawn to the world of coffee because of their fascination with latte art, dreaming of one day effortlessly creating delicate and intricate patterns. But how long does it take to create aesthetically pleasing latte art designs? In reality, if your goal is just a simple shape, you can get the hang of it in as little as one day or up to two or three days; if you aim for complex, composite designs, then mastering the principles and maintaining consistent practice is essential. This article will delve into the mechanics of milk pouring, fusion and drawing techniques, finishing pointers, along with practical training suggestions, while also highlighting how cup diameter and base curvature subtly influence your latte art performance — helping you enter the world of latte art more smoothly.

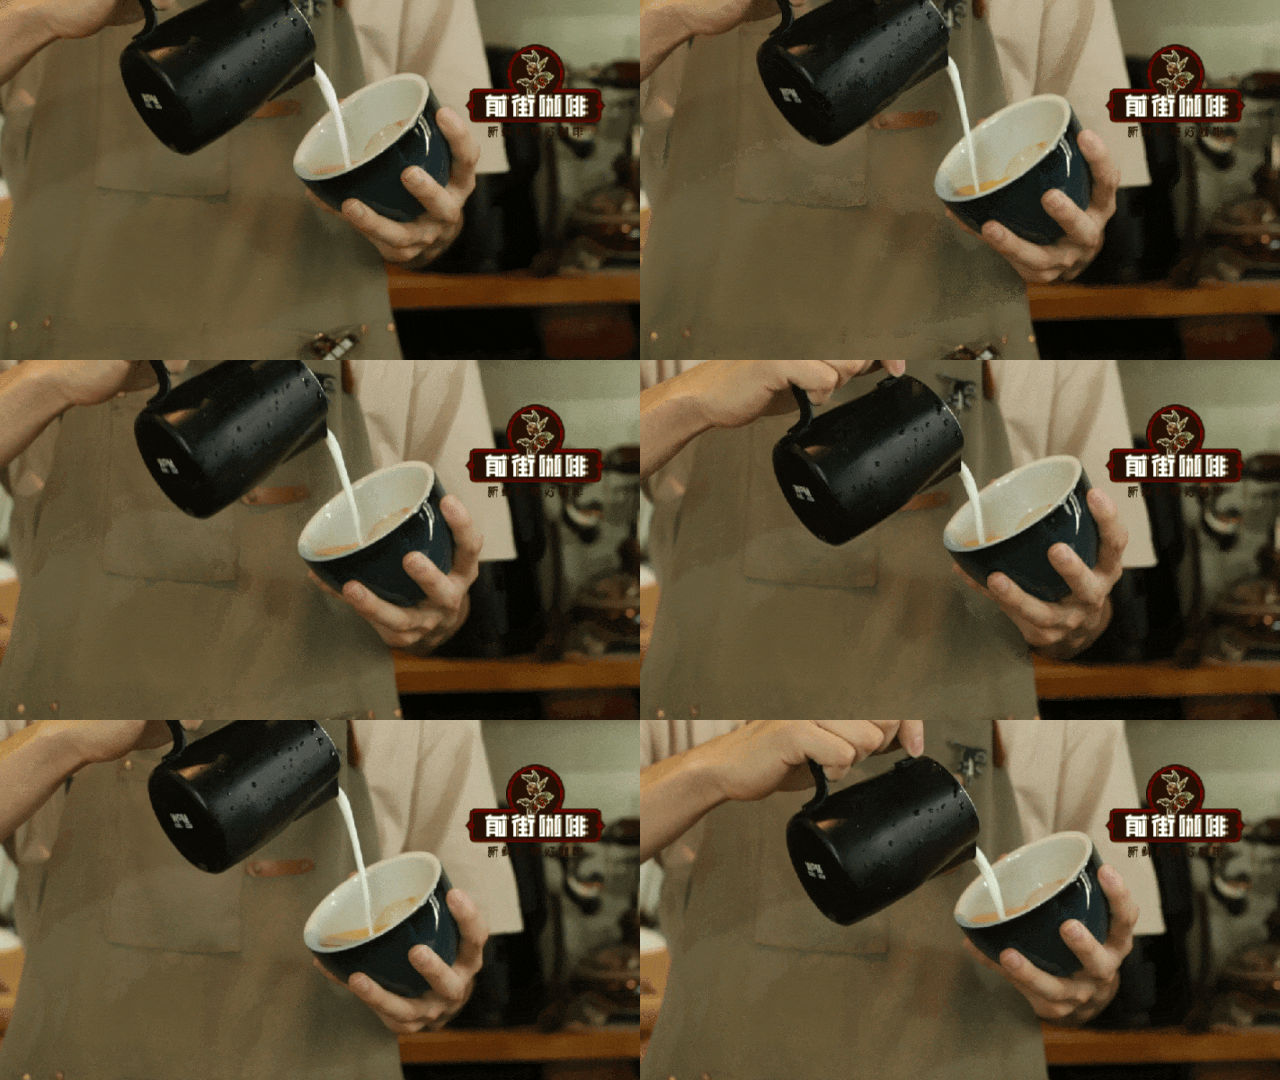
Latte art mainly consists of two key actions: fusion and drawing. The difference lies in the height between the spout of the pitcher and the surface of the coffee. When the spout is held higher above the coffee surface, the milk foam is poured directly into the coffee and blends with it — this is what we call “fusion.” When the spout is nearly touching the surface, varying the pouring pressure creates different forms of white streaks on the coffee surface — this marks the beginning of “drawing.”
Generally, it’s recommended to first fuse the milk with the coffee until the cup is about half full before starting the drawing phase. This ensures that the milk foam and coffee base are well integrated and helps stabilize the subsequent drawing process, aiding in the formation of the pattern.

Fusion technique is the foundation of latte art — it’s definitely not just about randomly shaking the pitcher. If fusion isn’t done properly, the surface may end up with uneven, blotchy patterns, resembling “a white shirt stained with smudges,” which negatively impacts the overall visual appeal. A common fusion method is: hold the cup in your left hand and the pitcher in your right, with both hands offset by roughly half a circle, making relative circular motions while controlling the spout height at5 to 10 centimeters, combined with moderate up-and-down lifting and stirring. This effectively avoids chaotic streaks and results in a smoother, more uniform fusion surface.
Once you move into the drawing stage, the technical demands increase significantly. By this point, about half a cup of coffee has already been poured. The following four key points will help you more accurately master the drawing techniques:
Key Point One: Hand Coordination & Controlling the Return Timing
When drawing, your right hand controls the milk foam output, while your left hand simultaneously adjusts the angle of the cup — this is the so-called “returning the cup” movement. Returning too early makes it hard for the pattern to form; returning too late may cause the coffee to overflow. Therefore, the focus of initial practice should be on developing hand coordination, allowing both hands to flexibly adjust the return angle based on the amount of milk foam being poured.
Key Point Two: Pouring Pressure & Stripe Thickness
The force with which you pour the milk foam directly affects the appearance of the stripes. The greater the force, the more milk foam is poured, typically resulting in thicker stripes; with less force, paired with appropriate wobbling, you can create fine, clear, and well-defined thin stripes. Additionally, the thickness of the milk foam also affects stripe quality — it's advisable to adjust the froth density according to actual conditions.
Key Point Three: Pattern Placement vs. Actual Positioning
Different latte art patterns have optimal placement points, but the actual outcome often deviates from expectations. For instance, a heart pattern is usually expected to sit at the center of the cup, but when starting the drawing, the entry point should be slightly toward the right side (i.e., closer to the pitcher side) because the returning motion and milk flow will alter the final position of the pattern.
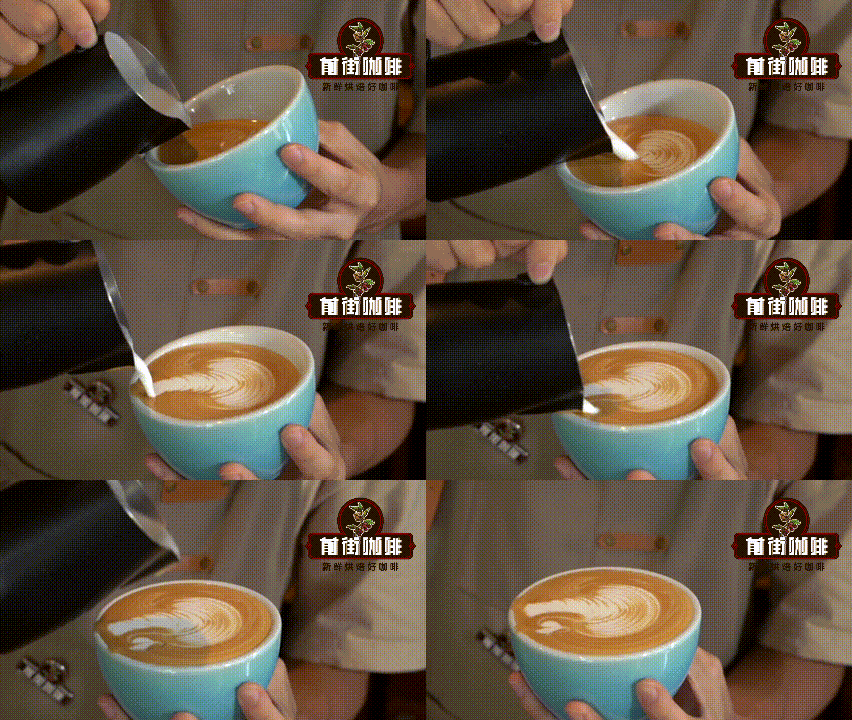
Key Point Four: Finishing Technique Determines Success or Failure
Finishing is the most critical and most overlooked part of the latte art process. Poor control of height during finishing can lead to overly thick lines, asymmetry, or even ruin the entire design. It’s recommended to begin the finishing process when the coffee level reachesnine-tenths full, and to maintain an appropriate distance between the pitcher and the coffee surface to avoid extra strokes or compromising the structure of the design.

For beginners in latte art, the following practical tips can help systematically improve your skills:
Tip One: Start with Real Coffee Practice
Initially, try practicing with real milk and coffee for 1 to 2 sessions to get familiar with the resistance of the spout and the feedback from the liquid surface. This is extremely helpful for later practice using dish soap or colorants. If possible, consistently practicing with real milk yields better results.
Tip Two: Build Muscle Memory as Your Primary Goal
There’s no need to rush into creating complex patterns. Focus instead on mastering the familiarity and consistency of cup-holding and pitcher-gripping posture, fusion techniques, returning techniques, and the finer points of pouring. Although progress might seem slow at first, once you build a solid foundation, you can master simple pattern latte art within one to two days.
Tip Three: Practice in Segments, Rest and Adjust Timely
Avoid long, continuous practice sessions that can lead to muscle fatigue and mental stagnation. It’s recommended to take short breaks every 20 minutes, review your previous movements, and reflect on areas for improvement. This aids in efficiency and helps internalize techniques.
Tip Four: Utilize Visual Feedback and Seek External Advice
If you hit a plateau or face uncertainties, take photos of your practice sessions and seek feedback. This helps uncover blind spots and accelerate your progress.
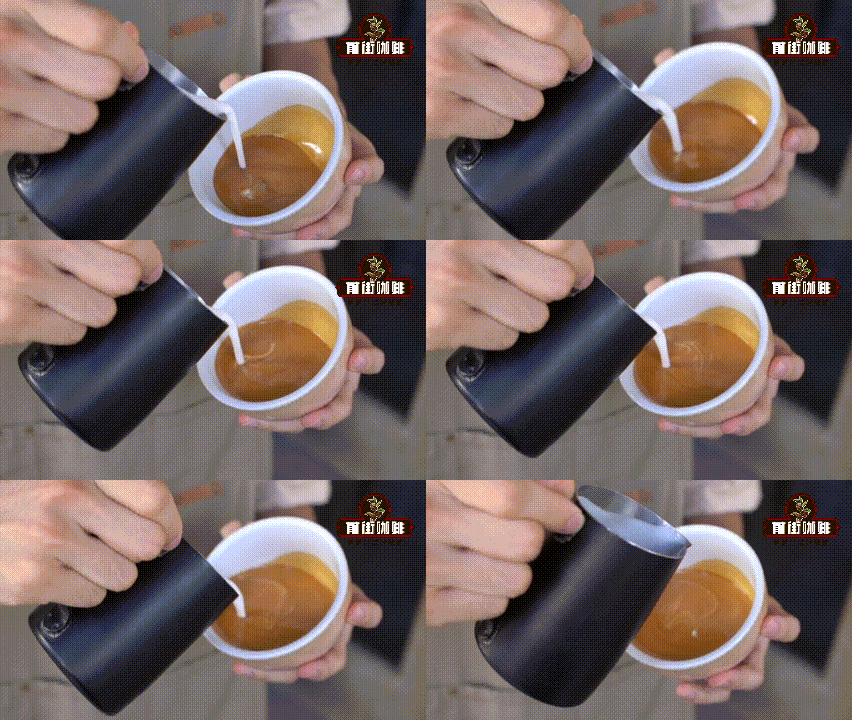
One last often-overlooked detail: cup design significantly influences latte art outcomes. Once you’ve mastered basic shapes (like hearts, leaves, tulips) and are ready to tackle composite patterns, pay attention to the type of cup you’re using. Wider cup mouths offer more drawing space; more pronounced cup base curves enhance the fusion effect between milk foam and coffee. In summary,wide-mouthed cups with curved bases better showcase the potential of advanced latte art techniques. Adjusting your cup choice might just be the key step to breaking through your current limitations. Give it a try now!
The above content is compiled by CoffeeHunters, a coffee news website.


